


Basic steps to installing a Lintel
When installing a lintel, you need to be sure that it's done right. If not, it can lead to serious complications.
We’ve been using lintels in the UK for thousands of years. You only need to take a trip to Stonehenge to see a perfect example of post-and-lintel construction that dates back as far as 2500 BC.
Today lintels are still an integral part of our buildings and homes.
When installing a lintel, you need to be sure that it’s done right. If not, it can lead to serious complications.
If you want to know how to start installing a lintel, read on as we look at the basic steps involved.
What Is a Lintel?
A lintel is a beam that is used above the openings for doors or windows in order to support the weight of the structure above.
Without a lintel, the entire load of the brickwork about a door or window would have to be carried by the window or door frame itself. A lintel spreads that load into the masonry on either side of the door or window, ensuring that door and window frames aren’t placed under undue pressure.
A lintel must be properly installed in order to function correctly.
Steps to installing a Lintel
Proper lintel installation requires numerous steps. We’ll take a look at some of the basics below.
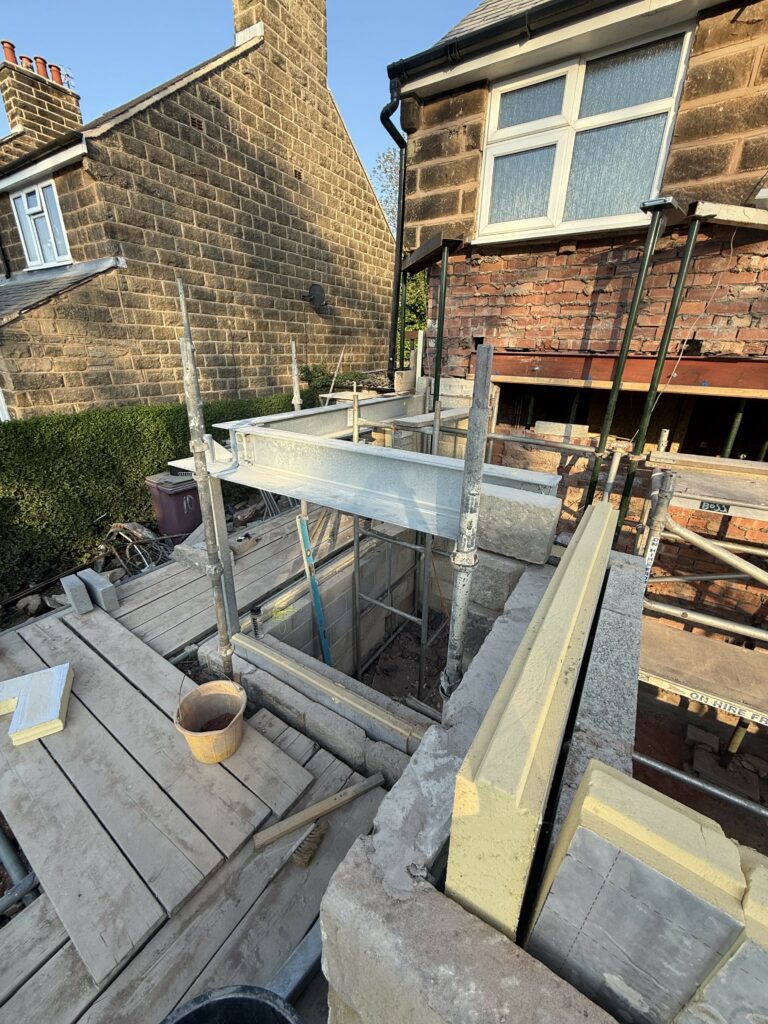
1. Minimum End Bearing
In order for a lintel to provide the correct support, it needs to extend far enough onto the brickwork at the side of the door or window.
The lintel should normally extend a minimum of 150mm beyond the opening on either side although down to 100mm is permissible under certain circumstances (check with the supplier or manufacturer if you need a reduced bearing). It’s not advisable to extend too far beyond this as you’ll be paying for more than you need.
2. Bedded on Mortar
You must bed your lintel on mortar.
By installing a lintel on a bed of mortar, it ensures that the loads are evenly distributed. The thickness of the mortar should be sufficient to accommodate any unevenness that there might be between the lintel and the support.
The lintel should be bedded on both leaves to ensure that load is spread symmetrically.
3. Make Sure the Lintel is Level
Once you’ve placed the lintel on the bed of mortar, you need to ensure that it’s perfectly level. If the lintel isn’t level, the load will not be evenly distributed and may place undue stress on parts of the supporting walls.
Use a spirit level to ensure that lintel is placed perfectly horizontally across the opening. You’ll also need to confirm that the lintel is level cross-wise too; in other words, you should confirm that neither leaf is higher than the other. If this is the case, it will put undue pressure on one of the leaves.
4. Allow Mortar to Cure Before Applying Loads
Once your lintel is level, you’ll need to allow the mortar to cure before applying any loads.
Until the mortar is completely cured, the load won’t be correctly transferred through the lintel and into the masonry on either side of the opening. If you’re in a rush and can’t wait for the mortar to cure, then you must ensure you place appropriate supports beneath the lintel before applying any loads.
5. Lay Bricks on Both Sides
Once the mortar is dry, or you have supports in place, you can start laying bricks.
You must ensure that you lay bricks on both sides simultaneously so that the load on each leaf does not get too far out of balance. In other words, once you’ve laid one or two rows of bricks on one side, you should stop and lay the same amount on the other side. You’ll need to repeat this process to ensure that the load is always the same or similar on each leaf.
If you put too much load on one side at once, you may damage the lintel or have an even worse problem. Don’t take the risk and always keep the loads on each leaf balanced.
6. Install a Damp Proof Course if Necessary
If the lintel is being installed as part of a cavity wall, then you should install a damp proof course.
Cavity walls are designed such that the outer leaf is intended to be damp, and the inner leaf dry, with the cavity ensuring that this remains the case. That’s why anything that bridges this cavity—such as a lintel—should be installed such that moisture doesn’t track between the two.
BS 8215 states that DPCs in masonry buildings should have a minimal fall of 150mm. This should be sufficient to prevent any moisture tracking inwards.
7. Propping Lintels
Some lintels will need to be propped until the mortar in the supported masonry has cured. This will normally be the case for “channel” lintels (those with a “C” shaped portion to one or both leaves) where the masonry built into the channel contributes to the strength of the lintel.
Where this is the case, the manufacturer will normally provide guidance in the form of a label applied to the lintel or give guidance within their technical literature. Please always check prior to installation if you are unsure.
Whilst not required, propping can also be beneficial for other lintels. Allowing the mortar to cure whilst propped will reduce the deflection of the lintel, which could be particularly noticeable for longer openings.
Key takeaways and guideance on installing a Lintel
Installation should always be in line with the manufacturer’s guidelines. If you are in doubt as to the structural performance or suitability of a lintel then please contact the manufacturers technical department before ordering/installation.
- Each lintel is different but most steel lintels should be propped at 1.2m ctrs and not removed until the mortar has cured.
- Minimum recommended end bearing = 150mm. The lintel should be bedded on mortar and levelled both along the lintel and across its width. Full bricks, blocks or padstonesshould be used as bearing areas. Do not bear onto cut blocks.
- All external wall lintels MUST be installed with a flexible damp proof course (DPC) or cavity tray. In the case of cavity walls the cavity tray should extend not less than 50mm beyond the cavity return.
- Inner and outer leaves supported by lintels should be raised together to avoid excessive eccentricity of loading.
- Masonry must not overhand any flange by more than 25mm.
- Masonry above the lintel should be allowed to cure before applying floor or roof loads.
Further guidance can be found in the manufacturer’s literature at Catnic or Stressline.
Are You Looking for High-Quality Lintels?
If you’re looking to purchase Stressline galvanized or Catnic lintels, then you’re in the right place.
We offer a wide range of products, with every cavity size in standard duty, heavy-duty, and extra-heavy-duty profiles. If you’re looking for an extreme load lintel, we’ve got you covered too. We are the only UK stockist to carry a full range of extreme load lintels from all the major brands.
Check out our range of products today.
Industry news
OurStoneHome Collaboration
OurStoneHome Collaboration At UKLintels, we love seeing our products in action – especially when they’re fea...
Read More
Clifton United Football Club Sponsorship
Clifton United Football Club Sponsorship At UKLintels, community is an important aspect of everything we do. That’...
Read More
Supplying the Nations Housebuilders
Supplying the Nations Housebuilders At UKLintels, we’re proud to be a trusted supplier to the UK’s leading h...
Read More